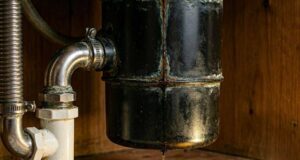
Discovering a puddle under your kitchen sink is a universal homeowner headache. However, if you take a flashlight, peer beneath your basin, and notice that the water is actively dripping from the horizontal connection on the side of your machine, you are in luck. A garbage disposal leaking from the side discharge pipe is one of the most manageable, cost-effective, and straightforward plumbing issues to fix on this appliance.
Unlike a fatal bottom leak—which usually signals a blown internal motor seal and requires a total machine replacement—a side-pipe leak is entirely external.
The side discharge pipe (often called the discharge elbow or waste line) handles the high-volume exit of blended food scraps and wastewater into your home’s P-trap system. Because this pipe is subjected to constant physical vibrations and shifting water pressure, its connection points can loosen over time. This comprehensive guide breaks down the primary causes behind side pipe leaks, how to isolate the exact issue, and the step-by-step methods to secure a bone-dry kitchen sink again.
The Anatomy of the Side Connection
To troubleshoot this problem effectively, you must understand the components that form this specific side junction. There are two primary plumbing inlets/outlets located on the side of a standard disposal unit:
[Upper Side Nipple]  ──────> Dishwasher Drain Hose Connection (Small inlet)
[Lower Side Opening] ──────> Main Discharge Waste Pipe (Large outlet)
                              ├── Flange Gasket (Internal Rubber Seal)
                              ├── Metal Plumber's Flange (Holding Bracket)
                              └── One or Two Mounting Bolts
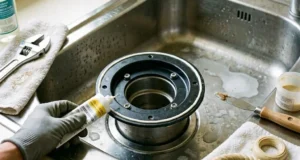
The main discharge pipe is typically a black or clear rigid plastic elbow that bends downward toward your household drain trap. It is held against the disposal body by a small metal bracket (the flange) and compressed tightly using one or two metal bolts. Inside the mouth of this connection sits a thick, circular rubber ring called the flange gasket. If any element of this mechanical assembly slips or degrades, an active leak will form.
The Top 4 Triggers for a Side Discharge Pipe Leak
When a garbage disposal leaking scenario is concentrated on the side outlet, the root cause almost always boils down to one of these common structural failures:
1. Loose or Backed-Out Mounting Bolts
The electric motor inside your disposal generates immense torque and high-frequency vibrations when grinding tough food waste. Over several years of regular operation, these micro-shocks act like a tiny jackhammer on your plumbing lines. It is incredibly common for the one or two metal bolts holding the side discharge pipe flange to slowly back out due to this vibration, dropping the compression and causing a slow weep.
2. A Perished, Split, or Misaligned Rubber Flange Gasket
The true waterproofing hero of the side assembly is the internal rubber flange gasket. This gasket sits squeezed tightly between the plastic pipe lip and the inner ridge of the disposal body. Over time, constant exposure to boiling water, caustic dish soaps, and grease causes this rubber to harden, dry out, and split. Once the rubber loses its elasticity, it can no longer maintain a tight seal against hydrostatic pressure.
3. Physical Shock and Pipe Realignment
The cabinet under a kitchen sink is prime real estate for storing heavy trash cans, plastic storage bins, and bulky cleaning supplies. Shoving a massive jug of detergent or a trash bin forcefully into the cabinet can easily strike the rigid black discharge elbow. This physical impact can shift the pipe out of its tight socket, strip the mounting screws, or create a gap in the gasket alignment.
4. Over-Tightening and Fractured Flanges
During initial installation or a previous DIY repair, it is easy to assume that tightening bolts as hard as humanly possible is best. However, over-tightening the discharge pipe bolts puts extreme stress on the plastic or thin metal mounting ears of the pipe flange. This excessive force can crack the plastic collar of the elbow, rendering it unable to apply uniform pressure across the rubber seal.
Step-by-Step Diagnostic Plan: Isolating the Leak
Before you begin unscrewing your plumbing lines, you must verify the exact source of the moisture to ensure you buy the correct replacement parts.
- Safety First: Disconnect the electrical power. Unplug the disposal unit from the under-sink wall outlet. If it is hardwired, flip the dedicated breaker switch to the “Off” position.
- Dry the Workspace: Use a microfiber cloth to thoroughly dry the side of the disposal body, the black plastic elbow, the bolts, and the lower trap pipes.
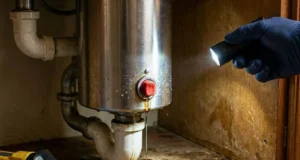
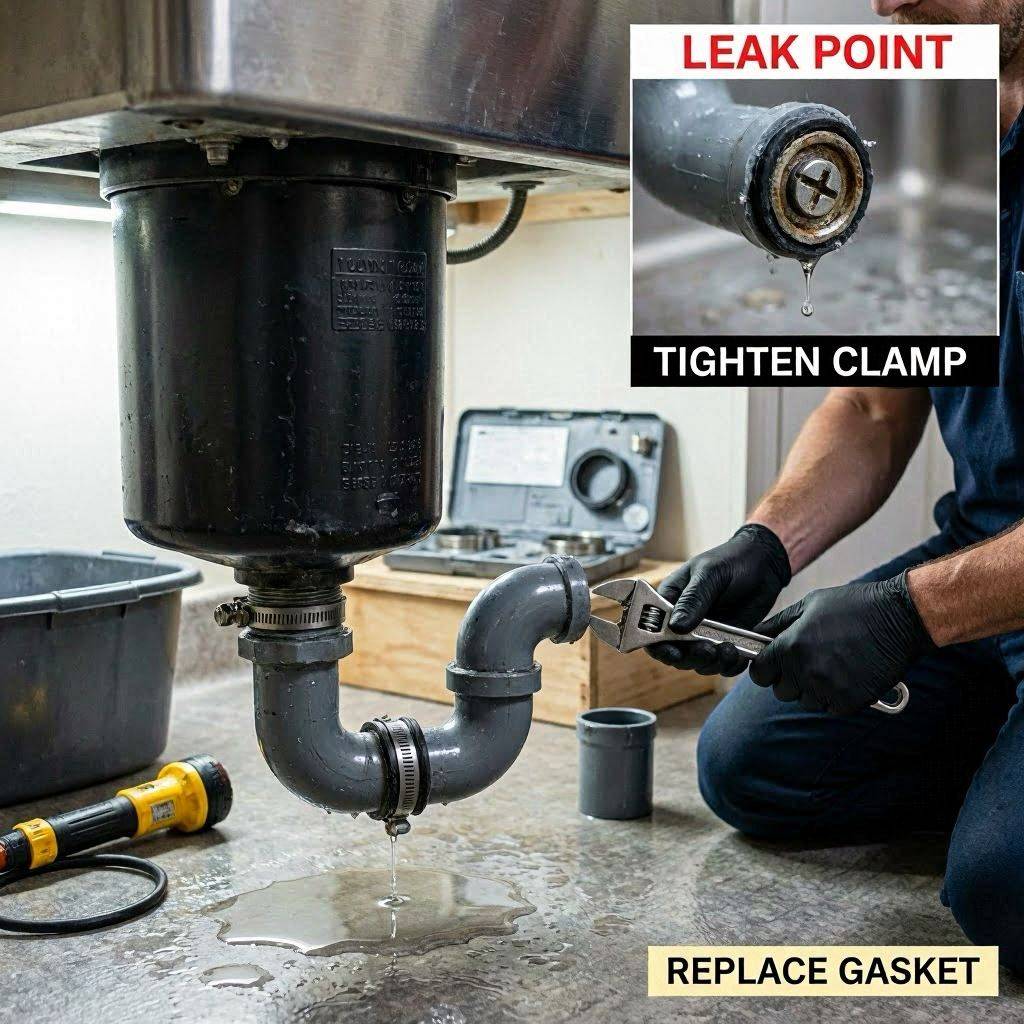
- Perform the Controlled Pour Test: Do not run the disposal motor. Turn on your kitchen faucet to a steady stream and watch the side pipe closely with a bright flashlight.
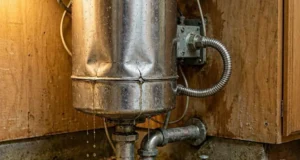
- If water begins to bead up immediately where the black plastic meets the colored metal housing of the disposal, your flange gasket or bolts are the issue.
- If water is dripping from the smaller hose located above the main pipe, your dishwasher clamp is loose.
How to Fix a Disposal Leaking From the Side Pipe
Once you have identified the side outlet as the culprit, follow this clear structural roadmap to resolve the issue cleanly.
1.Prepare the Area and Drain the Line:5 Minutes.
Place a shallow plastic basin or an old towel directly beneath the side plumbing assembly to catch any trapped wastewater. Use a screwdriver or nut driver to loosen the hose clamp on your dishwasher line (if applicable) and pull the rubber hose off its upper nipple to give yourself room to work.
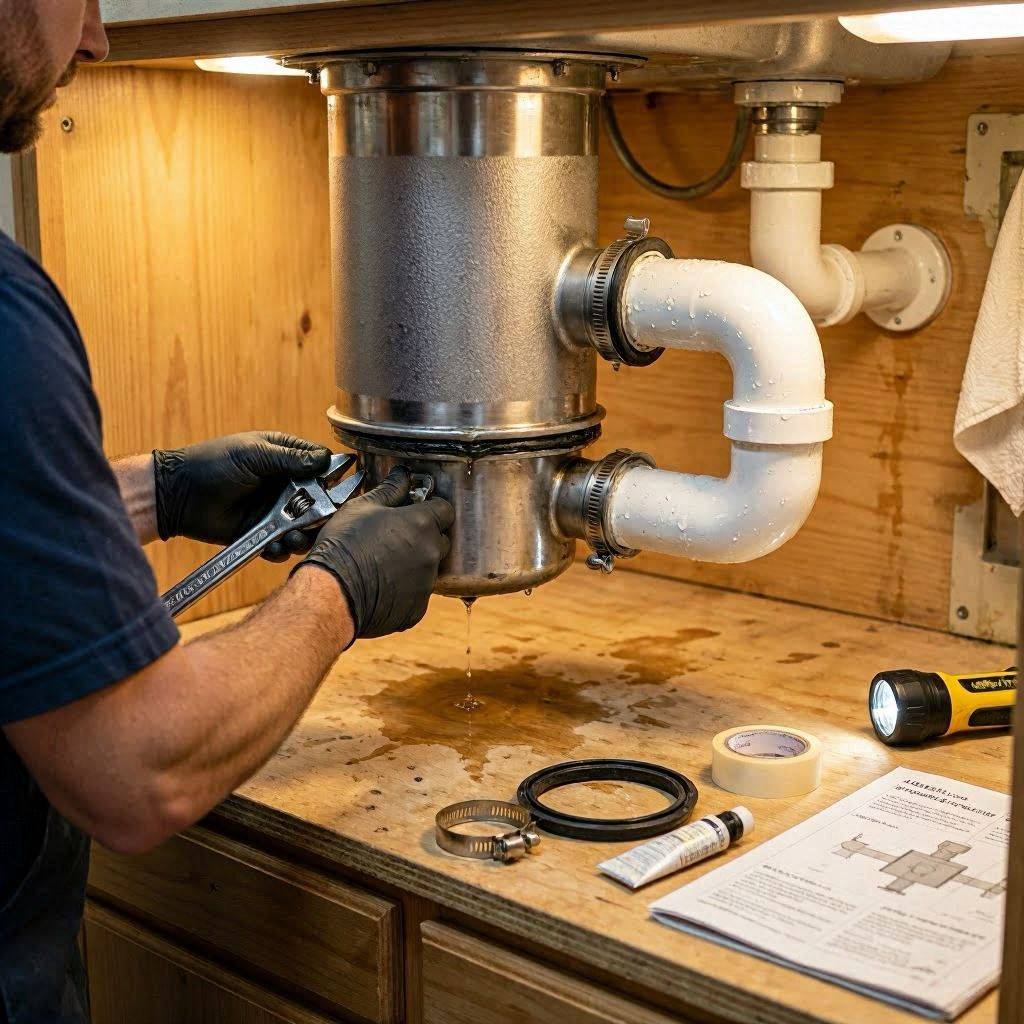
2.Remove the Mounting Bolts and Discharge Elbow:10 Minutes.
Locate the one or two metal bolts holding the black discharge pipe against the side of the disposal. Use a flathead screwdriver, Phillips head screwdriver, or socket wrench to turn these bolts counterclockwise. Remove the bolts completely, slide the metal mounting bracket back, and gently pull the black plastic pipe out of the disposal body socket.
3.Inspect and Clean the Gasket Interface:10 Minutes.
Reach inside the side opening of the disposal or pull the rubber gasket off the end of the black plastic pipe. Inspect the rubber closely under good lighting for visible splits, flattened ridges, or dry-rot cracks. Use an old rag dipped in warm water or rubbing alcohol to thoroughly clean away any slime, food residue, or mineral scale buildup from the inner mounting mouth of the machine and the lip of the pipe.
4.Seat the New Gasket and Re-insert the Pipe:10 Minutes.
If your old gasket is compromised, take it to your local home improvement store to match the exact diameter (most standard units use a specific stepped or ribbed gasket). Fit the fresh, flexible rubber gasket cleanly over the lip of the black discharge pipe, ensuring the flat side sits flush against the pipe face or seats completely inside the disposal opening recess according to the manufacturer’s design.
5.Re-engage Bolts with Balanced Compression:15 Minutes.
Align the black discharge pipe straight into the side opening of the disposal. Slide the metal mounting flange into place over the pipe ears. Thread your mounting bolts in by hand first to avoid cross-threading the plastic housing. Using your tool, tighten the screws evenly—turn the left screw twice, then the right screw twice. This maintains uniform compression across the face of the rubber gasket. Stop tightening once the screws are snug; do not over-torque.
Testing Your Repair for Total Success
Before loading your cleaning supplies back under the sink, perform a rigorous pressure test to ensure your new seal can handle real-world kitchen use:
- The Low-Pressure Test: Run cold water down the sink drain for two full minutes. Run your fingers all around the underside of the side connection to feel for any microscopic wetness or weeping.
- The High-Pressure Dump Test: Insert your sink stopper and fill the basin with about 3 inches of water. Remove the stopper while simultaneously flipping the disposal power switch back on. The combination of standing water weight and active motor vibration creates maximum structural stress on the side pipe. If the connection remains completely dry during this high-volume flush, your repair is an absolute success.
Proactive Habits to Protect Your Side Pipes
To ensure your side drain lines remain secure and avoid a recurring garbage disposal leaking problem down the road, integrate these preventative measures into your household routine:
- Organize with Clearance: When packing items under your sink, leave a 2-inch “buffer zone” around the black plastic discharge pipe. Never lean heavy storage crates, grocery bag organizers, or plungers directly against the plumbing lines.
- Check Bolt Tightness Annually: Make it a habit during your regular deep-cleaning routine to check the side pipe bolts. Give them a gentle turn with a screwdriver to ensure the continuous vibration of the machine hasn’t started backing them out.
- Avoid Vibrational Overload: Never drop rock-hard objects like thick beef bones, seafood shells, or fruit pits into the machine. The violent, erratic shaking caused by these items can easily warp plastic plumbing brackets and break external pipe seals.