
et’s be honest: looking under your kitchen sink can be intimidating. It’s a cramped, dark maze of pipes, hoses, and wires. But here is the good news—you don’t need a master’s degree in plumbing or electricity to install a new garbage disposal. If you can handle a screwdriver, a hammer, and a little patience, you can absolutely tackle this project over a weekend.
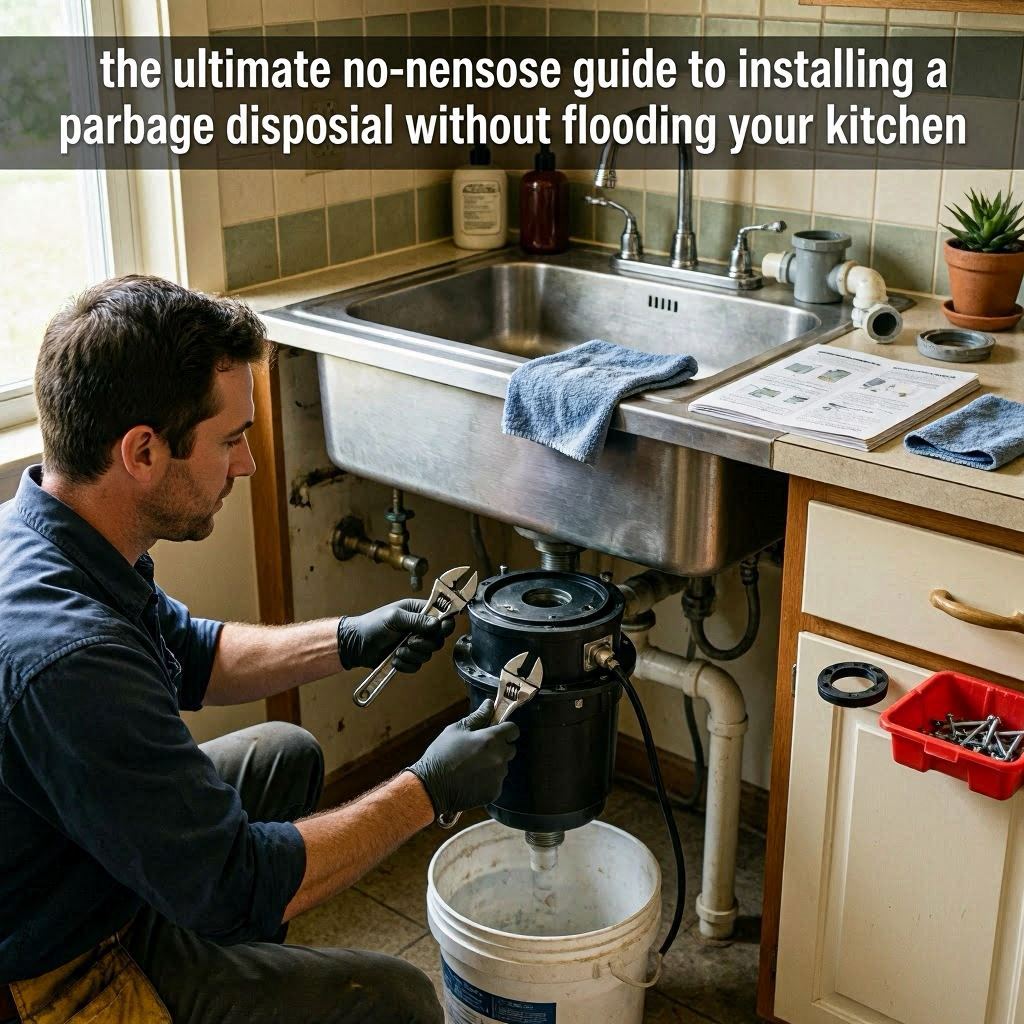
That said, knowing your limits is a superpower. If looking at a circuit breaker makes you break a sweat, there is zero shame in calling a trusted local handyman or bribing a handy family member with dinner to help you out.
However, if you are ready to roll up your sleeves and save some serious cash, this step-by-step blueprint will walk you through the process cleanly and efficiently.
Pre-Game Checklist: Power and Prep
Before you even unbox that shiny new disposal, we need to talk about the boring but critical stuff: power.
Your garbage disposal requires a dedicated 120V 20-Amp outlet underneath the sink. Take a look down there right now. If you don’t see an outlet, stop what you are doing. You will need an electrician to run a line before you can proceed.
If you already have the outlet, perfect. Turn off the power immediately. Go to your home’s main service panel (breaker box) and flip the switch controlling that under-sink outlet to “Off.” If your home uses a fuse box, remove the fuse. Double-check that the power is truly dead by plugging a lamp or a phone charger into the outlet before you touch anything else. Safety first, always.
Note on Old Units: If you are replacing a broken unit, you’ll obviously need to get it out of the way first. Disconnect the drain lines, unclamp the old unit from the mounting ring, and set it aside. Clean up any leftover gunk around the sink drain before moving forward.
Step 1: Prepping the Sink Flange and Mounting Ring
The sink flange is the metal collar you see when you look down into your sink drain. The mounting ring sits underneath, hidden from view. Together, they act as the anchor system holding up your heavy disposal unit. Getting this right is absolutely crucial if you want to avoid a frustrating garbage disposal leak down the road.
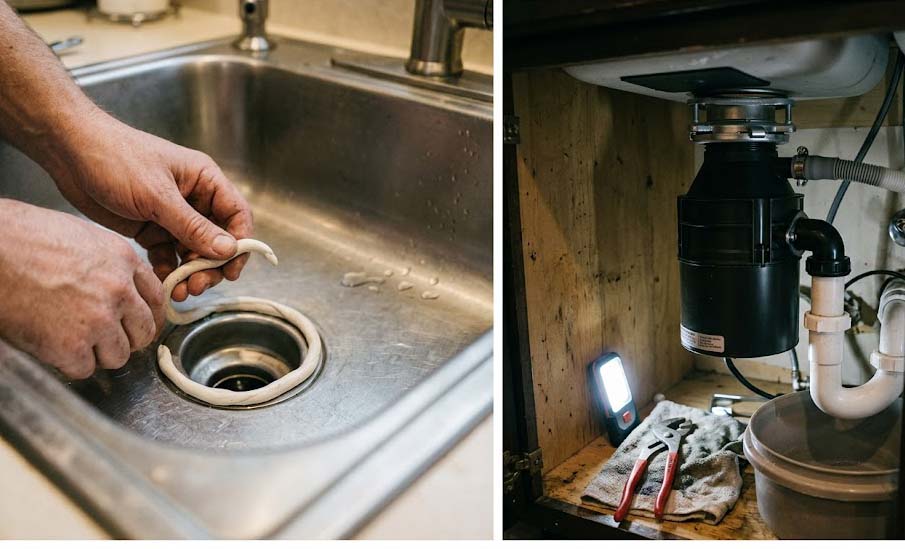
- Roll Out the Putty: Grab a tub of standard plumber’s putty from the hardware store. Roll a handful between your palms until you have a rope that is roughly a half-inch thick. Wrap this putty rope completely around the underside of the new sink flange.
- Set the Flange: Firmly press the flange down into the sink’s drain opening. The pressure should squeeze out some excess putty around the edges—that’s a good sign; it means you are getting a solid seal.
- The Under-Sink Shuffle: This is where a helper comes in handy. Have someone stand above the sink and press down hard on the flange. Meanwhile, you’ll dive underneath the sink to slide the rubber gasket and the triangular metal attachment onto the protruding flange neck. (If you’re working solo, you can weight the flange down from above using the old disposal unit or a heavy stack of books).
- Snap it in Place: Snap the metal spring clip (or snap ring) into the groove on the flange neck. This is what stops the whole assembly from sliding off.
- Tighten the Screws: The mounting ring features three primary screws. Do not just crank one down all the way. Instead, tighten them evenly, a few turns at a time, moving in a circle. This ensures equal pressure against the bottom of the sink, which is your best insurance policy against a future garbage disposal leak.
- Clean Up: Head back top-side. Use a soft cloth to wipe away the excess plumber’s putty that squeezed out around the drain.
Step 2: Wiring the Disposal
Most new disposals don’t come with a pre-installed power cord. Don’t panic—wiring it up is incredibly straightforward.
Flip the disposal upside down so you are looking at the bottom. You will see a small metal access plate. Remove the screw holding the plate in place and set it aside. Inside, you’ll find three wires.
Bring in your power cord through the strain-relief clamp. Connect the wires color-to-color using plastic wire nuts:
- White to White (Neutral)
- Black to Black (Hot)
- Green to Green (Ground)
Gently push the wires back into the bottom compartment, reattach the metal cover plate, and tighten the screw.
Step 3: The Dishwasher Knockout (Optional)
Does your dishwasher drain into your garbage disposal? If the answer is no, skip this step entirely.
If the answer is yes, look near the top collar of your new disposal. You will see a small, plastic inlet tube where the dishwasher hose attaches. Right now, that tube is blocked by a plastic plug called a knockout plate.
Take a flathead screwdriver, place it flat against the plug inside the tube, and give the handle a sharp rap with a hammer. The plastic plug will pop right into the main grinding chamber of the disposal. Reach your hand inside the top of the disposal and make absolutely sure you fish that loose plastic piece out. Leaving it inside will wreck your unit the moment you turn it on.
Step 4: Mounting the Heavy Unit
Now it’s time for a little muscle. You need to lift the main disposal body and mate it with the mounting ring you installed in Step 1.
Line up the three mounting ears on the disposal’s top collar with the three sloped ramps on the mounting ring. Lift the unit up, push it into place, and rotate the lower mounting ring. The ears should slide up the ramps and pull the disposal tight against the sink gasket.
Step 5: Connecting the Plumbing Lines
With the unit hanging securely, you can now connect it back to your home’s wastewater system.
- Attach the Discharge Pipe: Bolt the black, curved discharge pipe onto the side of the disposal using the provided rubber gasket and screws. Make sure this connection is completely straight and tight. A misaligned gasket here is a prime culprit for a messy garbage disposal leak.
- Align with the P-Trap: Rotate the disposal unit on its mounting ring until the discharge pipe aligns perfectly with your existing wall drain trap (the P-trap).
- Check the Fit: If your new disposal is a different size than your old one, your existing pipes might be too short or too long. Don’t sweat it—every hardware store sells cheap, trimmable plastic slip-joint pipes to bridge the gap. Tighten all compression nuts firmly by hand, then give them a quarter-turn with pliers. Do not over-tighten plastic threads, or they will crack.
Step 6: Locking It Down and Testing
We are at the finish line, but do not skip this final mechanical step.
Take the specialized silver wrench that came in the box (or a thick screwdriver) and insert it into one of the loops on the mounting ring. Forcefully rotate the ring until you feel the unit completely lock into place past the ridges on the ramps. This ensures the vibration of the motor won’t cause the unit to back off over time.
The Moment of Truth
Now, we test your handiwork.
Before restoring the electricity, turn on your kitchen faucet. Run cold water down the drain for a solid two minutes. Get under the sink with a flashlight or your phone light and inspect every single joint. Touch the bottom of the sink flange, the dishwasher inlet, and the PVC pipe connections. If you detect even a single drop of water, you have a garbage disposal leak that needs addressing. Turn off the water, tighten that specific connection slightly, wipe it dry, and check again.
Once everything stays bone dry, go ahead and flip your circuit breaker back on. Plug the unit into the wall outlet.
Run a steady stream of cold water, flip the kitchen wall switch, and listen to that beautiful, smooth hum. You’ve officially upgraded your kitchen, saved yourself a hefty plumber’s fee, and built a leak-free setup that will last for years to come.