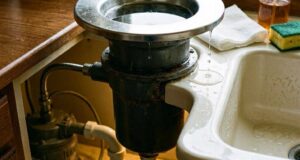
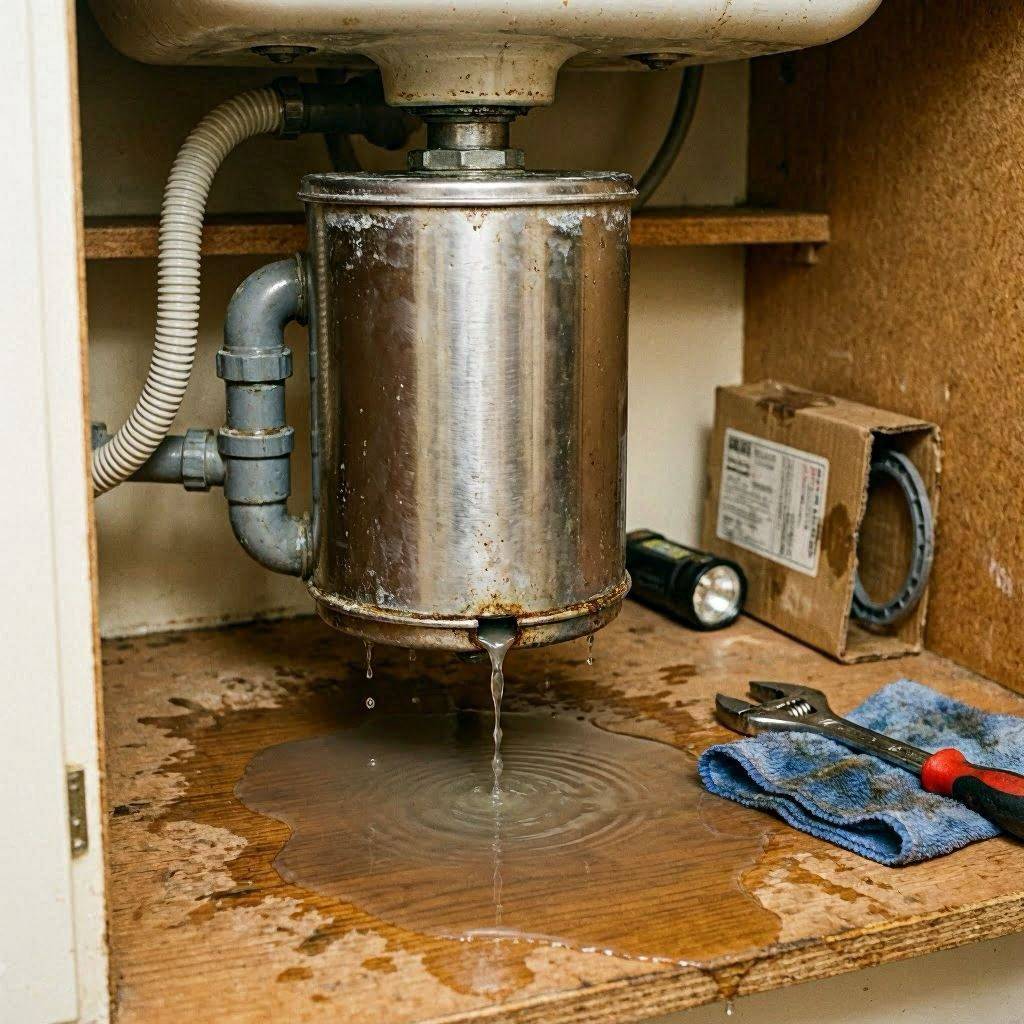
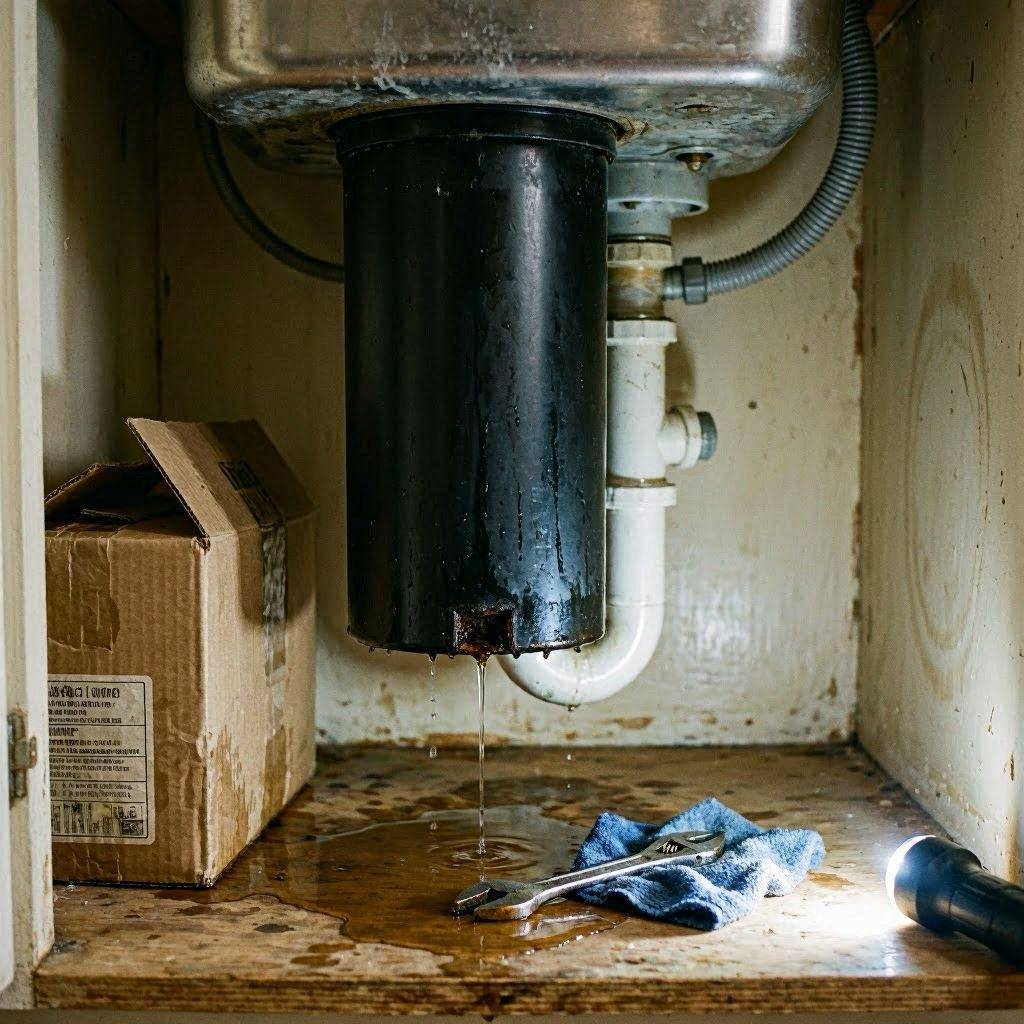
Waking up to a pool of stagnant water beneath your kitchen sink is a classic homeowner headache. If you take a flashlight, peer into the dark corners of your cabinet, and spot a steady drop forming directly on the lowest plastic or metal plate of your appliance, you have a specific plumbing situation on your hands. A garbage disposal leaking from its very bottom represents a distinct class of mechanical failure that requires a targeted diagnostic approach.
When water originates from the bottom—often dripping right through the red reset button or the electrical wire housing—it tells a completely different story than a simple loose pipe or a degraded top gasket.
This comprehensive guide will walk you through verifying the exact source of the leak, evaluating your actual repair options, and executing the necessary steps to get your kitchen sink safely back in working order.
Step 1: The Critical Preliminary Inspection (Isolate and Verify)
Before you grab a single wrench or screwdriver, you must understand that dealing with water around electrical machinery carries inherent safety hazards.
1. Disconnect the Power Immediately
Never attempt to diagnose or fix an appliance while it is connected to live electricity. Crawling under a wet sink cabinet to touch a unit that might have water inside its electrical housing is dangerous. Reach under the cabinet and unplug the electrical cord directly from the wall outlet. If your unit is hardwired straight into a junction box, go to your home’s main electrical breaker panel and flip the dedicated circuit switch to the “Off” position.
2. Perform the Paper Towel Test to Confirm the Origin
Water obeys gravity, which can easily trick your eyes. A leak occurring at the very top sink flange or along the dishwasher bypass inlet can trickle down the dark exterior body of the machine, pool at the lowest edge, and make you think the bottom shell has failed.
To rule this out, take a dry paper towel and thoroughly wipe down the entire external body of the machine until it is bone dry. Next, place a fresh, dry sheet of paper towel directly underneath the unit. Run a gentle stream of water down the sink drain for two minutes without turning the machine on.
[Flange Leak] ──> Drops travel down exterior shell ──> Trickles to bottom
[Internal Leak] ──> Passes through motor housing ──> Drops directly from center hole/reset button
Examine the paper towel:
- If the towel is wet directly beneath the center plate or the red overload switch, you are dealing with a true internal failure.
- If the towel shows dampness tracking down from the top rim, your problem lies higher up with an external gasket or connection point.
Step 2: Evaluating the Realities of an Internal Bottom Leak
If your paper towel test confirms that the water is emerging from inside the very bottom shell, you are dealing with a failure of the internal mechanical shaft seal. This rubber or carbon seal sits directly below the spinning flywheel and above the electric motor compartment. Over thousands of operational cycles, this seal loses its flexibility, cracks, or wears thin due to friction and food particles.
Can You Repair an Internal Flywheel Seal?
Here is the honest, direct truth that saves you hours of frustrated DIY effort: You cannot realistically fix an internal seal failure.
Garbage disposal manufacturers design these units as factory-sealed assemblies. They do not sell standalone replacement internal shaft seals to consumers, nor do they provide a way to open the sealed motor compartment without permanently compromising the structural integrity of the machine. Once water breaches this internal barrier and begins dripping from the base, the water has already contaminated the electrical motor windings.
Therefore, if the leak is genuinely coming from inside the bottom shell, the only real “fix” is a complete replacement of the appliance.
Step 3: What to Do If the Leak Is Higher Up (The True Fixable Scenarios)
If your diagnostic inspection revealed that your garbage disposal leaking issue is actually caused by water tracking down the outside of the shell from higher connections, you are in luck. These scenarios are completely fixable with basic hand tools. Here is how to address the three most common external culprits:
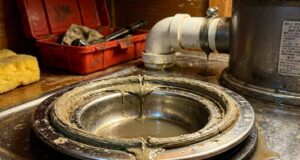
Fix A: Tightening or Re-sealing the Sink Flange
The sink flange is the metal ring that connects the disposal unit to the sink drain opening. Over time, the plumber’s putty sealing this connection can dry out and crumble due to sink movement or harsh dish soaps.
- Support the Unit: Place a small car jack or a stack of sturdy books underneath the disposal to take the weight off the mounting ring.
- Release the Mounting Assembly: Use a screwdriver or the specialized silver wrench that came with the unit to rotate the lower mounting ring counterclockwise. This unlocks the unit from the sink flange. Lower the machine out of the way.
- Inspect the Putty: Pop out the old sink flange from the top of the sink. Clean away every trace of old, brittle putty from both the sink basin surface and the metal flange using a plastic putty knife.
- Apply Fresh Sealant: Roll a handful of fresh plumber’s putty into a consistent rope about 1/2-inch thick. Wrap this rope around the underside of the clean sink flange.
- Reinstall and Compress: Press the flange firmly back down into the sink opening. From underneath, reinstall your cardboard gasket, backup ring, and mounting ring. Tighten the three mounting screws evenly until the putty squeezes out smoothly in the sink basin above. Wipe away the excess putty, re-hang the disposal body, and lock the mounting ring back into place.
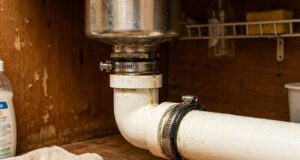
Fix B: Adjusting and Tightening the Discharge Drain Pipe
The waste discharge pipe is the black plastic elbow tube that carries dirty water away from the side of the disposal and into your home’s trap system.
- Check the Screws: This pipe is held against the disposal body by a metal flange secured by one or two bolts. Check if these bolts have backed out due to kitchen vibrations.
- Inspect the Internal Rubber Gasket: Remove the bolts completely and pull the black pipe away from the machine. Inside the connection mouth sits a round, thick rubber gasket (often called a flange gasket). Inspect it for splits or distortions.
- Replace and Re-assemble: If the gasket is cracked, pick up a matching replacement at a local home improvement center. Seat the fresh gasket cleanly into the recess, align the discharge pipe, and tighten the mounting bolts evenly. Do not over-torque them, as you can crack the plastic ears of the pipe flange.
Fix C: Securing the Dishwasher Bypass Connection
If your dishwasher drains through your disposal, a small rubber hose connects to a metallic nipple on the upper side of the appliance body.
- Inspect the Hose Clamp: Check if the metal spring clamp or screw-driven hose clamp has slipped out of position.
- Adjust and Tighten: Use a pair of pliers or a nut driver to loosen the clamp, push the rubber dishwasher hose firmly onto the nipple until it seats completely against the disposal body, and retighten the clamp securely directly behind the hose lip.
Step 4: Step-by-Step Replacement of a Failed Disposal Unit
If your diagnostic tests confirmed a fatal internal seal failure, replacing the machine is your mandatory path forward. Installing a new unit is a highly manageable DIY project that typically takes less than an hour.
1.Disconnect Plumbing and Drop the Old Machine:15 minutes.
Place a bucket underneath the assembly. Loosen the hose clamp on the dishwasher line and pull the hose free. Use a wrench to detach your main waste discharge pipe. Supporting the bottom of the heavy disposal with one hand, use your free hand to insert a screwdriver into the mounting ring ear and twist counterclockwise. The heavy machine will drop free immediately; lower it into your bucket carefully.
2.Transfer or Wire the Electrical Cord:10 minutes.
Most new disposals do not come with an attached power cord. Flip your old machine upside down, remove the metal electrical cover plate, and disconnect the wire nuts (White to White, Black to Black, Green/Bare to the ground screw). Unthread the strain relief clamp. Transfer this entire cord and clamp assembly to the bottom plate of your new machine, wiring it exactly the same way. Secure the metal cover plate tightly.
3.Prep the New Mounting Assembly:10 minutes.
If your old sink flange is in perfect, leak-free condition and is compatible with your new machine (standard 3-bolt systems usually are), you can leave it in place. If you choose to replace it, install the new flange using fresh plumber’s putty as described in the “Fix A” section above.
4.Hang and Lock the New Appliance:15 minutes.
Lift the new disposal up to the mounting assembly. Align the three mounting ridges on the unit with the ramps on the mounting ring. Lift the unit firmly while turning the lower mounting ring clockwise until all three ridges snap completely over the locking ridges. You will feel a distinct physical click when the unit locks securely into position.
5.Reconnect Lines and Perform a Pressure Test:10 minutes.
Reattach your black discharge waste pipe using its fresh gasket, and clamp your dishwasher hose back onto its upper nipple. Remove the bucket from the cabinet base. Turn on your kitchen faucet to full blast and run cold water down the drain for three full minutes. Feel all around the connections with dry fingers to verify a completely watertight seal before plugging the electrical cord back into the wall outlet.
Proactive Habits to Protect Your New Investment
To ensure your newly installed machine avoids a premature garbage disposal leaking issue down the road, implement these preventative practices immediately:
- Ditch Caustic Chemicals: Never use standard industrial chemical gel cleaners to clear slow kitchen drains. The chemical soup sits at the bottom of the grinding chamber, eating away at the rubber lip of your new shaft seal. Use a manual hand snake or natural enzyme treatments instead.
- The Cold Water Habit: Always use a generous stream of cold water whenever the disposal is grinding. Cold water prevents the motor from overheating, protects the integrity of the internal rubber parts, and solidifies oils so the impellers can chop them up without creating sticky sludge.
- Avoid Over-Feeding: Do not feed large quantities of fibrous items (like onion skins, celery stalks, or potato peels) into the chamber all at once. The immense torque required to clear massive jams puts extreme pressure on the central shaft, twisting the internal seal out of alignment.