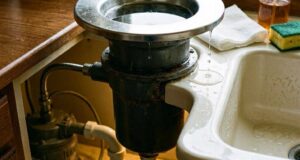
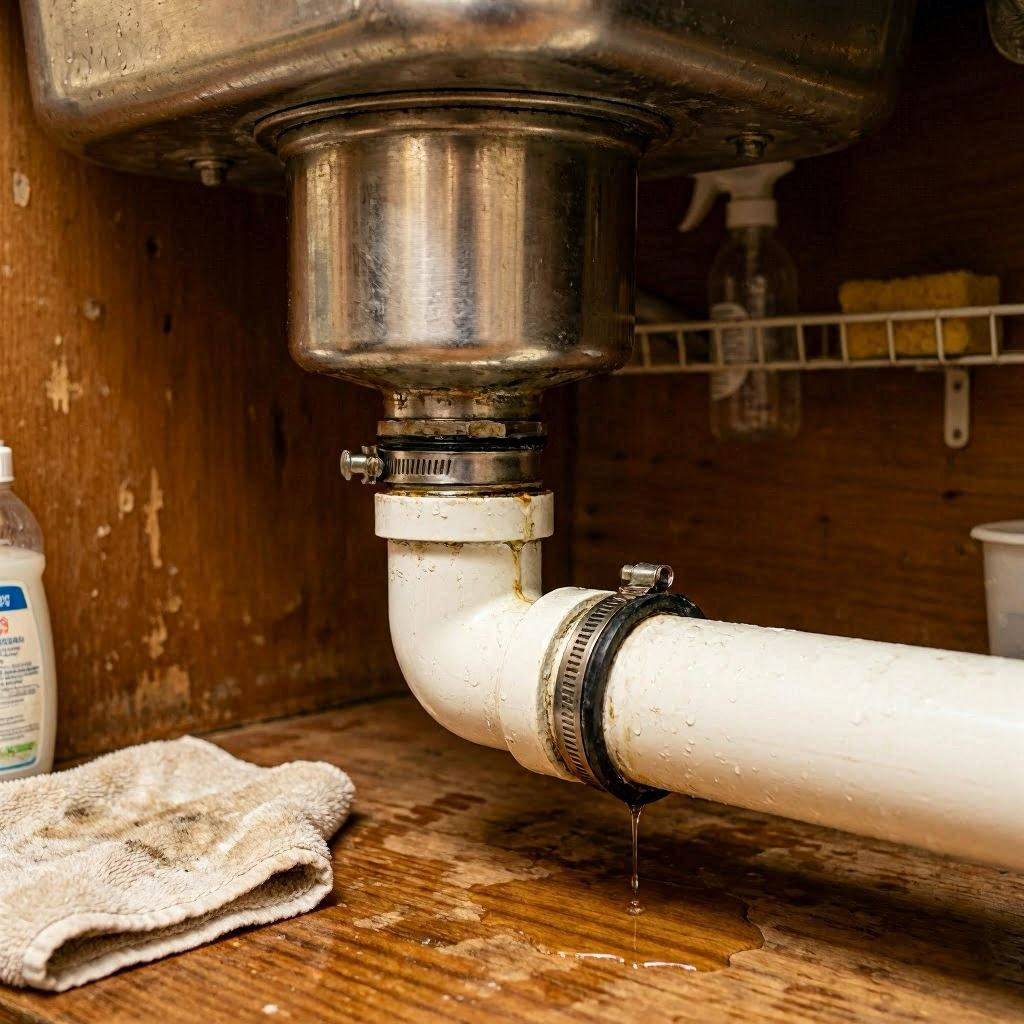
A pool of stagnant water beneath the kitchen sink is one of those household annoyances that demands immediate attention. When you take a flashlight, clear out the cleaning supplies, and trace the water back to the side of the unit, you may discover it is emerging from the straight horizontal pipe rather than a bent elbow. A garbage disposal leaking from the straight discharge pipe is a very specific plumbing scenario, but fortunately, it is highly fixable.
Unlike a fatal internal base leak that destroys the electric motor, a leak localized at the straight discharge tube (the pipe that carries pulverized food waste directly out into your kitchen drain lines or a dual-sink tee) is an external plumbing problem.
Because this horizontal connection handles high volumes of water under vibrational stress, it is a common site for wear and tear. This comprehensive, research-based guide covers why this straight pipe connection fails, how to confirm your diagnosis, and the exact steps to restore a bone-dry cabinet base.
The Anatomy of a Straight Pipe Connection
Most people are familiar with the standard 90-degree curved elbow pipe that comes with a garbage disposal. However, in many dual-basin sinks or shallow-plumbing configurations, a straight discharge pipe (or straight tube) is used instead. This straight pipe extends horizontally from the side of the unit to connect directly into a waste tee or a wall drain trap.
[Disposal Body Outlet]
└── Internal Gasket Channel
└── Stepped Rubber Flange Gasket (The True Seal)
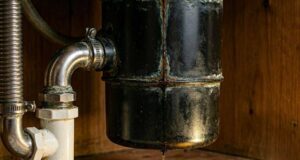
└── Rigid Straight Plastic/Metal Pipe
└── Metal Mounting Flange (Two-Bolt or Single-Clamp Bracket)
This connection is completely mechanical. It relies on a thick rubber flange gasket compressed tightly between the lip of the straight tube and the disposal’s inner exit collar. A metal plate with one or two bolts provides the squeezing pressure. When this mechanical compression fails, a garbage disposal leaking issue is inevitable.
Top 4 Reasons for a Straight Discharge Pipe Leak
When water begins to weep or spray from this horizontal junction, the root cause almost always points to one of these four structural issues:
1. Vibration-Induced Bolt Backout
The high-torque motors inside garbage disposals spin at immense speeds, frequently between 1,700 and 2,800 RPM. When processing hard food waste like fruit pits, ice cubes, or small dense vegetable scraps, the unit produces sharp, repetitive micro-vibrations. Over several years, these continuous physical shocks act like a slow jackhammer on your plumbing hardware, causing the mounting bolts holding the straight pipe bracket to back out and lose their grip.
2. Degraded or Pinched Flange Gasket
The true barrier preventing wastewater from flooding your cabinet is the rubber flange gasket. Because this gasket is constantly subjected to hot water, grease, acidic food liquids, and alkaline dish soaps, the rubber eventually undergoes chemical degradation. It can harden, develop structural micro-cracks, or lose its elastic memory. If the gasket was slightly misaligned or pinched during a previous installation, the high water pressure from a full sink will eventually punch right through the weak spot.
3. Misalignment and Cabinet Impacts
The cabinet space underneath a kitchen sink is heavily utilized. Forcefully shoving a large plastic trash bin, a stack of heavy baking sheets, or bulky chemical jugs into this area can easily cause an object to smash against the protruding straight discharge pipe. Because a straight line has less flex than a curved elbow, a sharp side-impact transfers significant force directly to the mounting bracket, bending the flange ears or shifting the pipe out of its tight socket.
4. Over-Tightening Leading to Flange Warping
A common mistake made during DIY installations is assuming that tightening plumbing bolts as hard as humanly possible ensures a better seal. In reality, over-tightening the straight pipe bracket bolts applies excessive, uneven stress to the metal or plastic mounting flange. This excessive force bends or warps the ears of the bracket, creating a gap in the center where the pipe lip no longer presses flush against the internal rubber gasket.
Step-by-Step Diagnostic Plan: Confirming the Straight Pipe Source
Before dismantling your under-sink drainage system, perform a quick and precise test to ensure the water is actually originating from the straight pipe connection and not tracking down from a loose sink flange or a leaky dishwasher line above.
- Isolate the Power Safely: Unplug the appliance cord from the wall outlet. If your machine is hardwired, switch off the dedicated circuit breaker.
- Dry the Assembly Completely: Use a dry microfiber cloth to thoroughly wipe down the side of the disposal body, the straight pipe, the bolts, and the lower P-trap pipe joints until everything is completely dry.
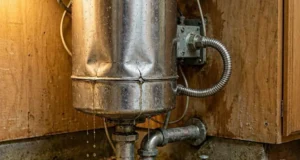
- Perform the Low-Flow Visual Test: Leave the disposal motor turned off. Turn on your kitchen faucet to a gentle stream and watch the straight horizontal pipe through a bright light.
- If water begins to bead up and drop right where the straight tube meets the metal body of the disposal, your straight pipe flange gasket or bolts are the culprit.
- If water is running down from above this pipe, your leak is coming from the upper sink flange connection or the dishwasher bypass nipple.
How to Fix a Disposal Leaking from the Straight Discharge Pipe
Once your diagnostic check confirms the straight pipe is the failure point, follow this clear structural roadmap to resolve the leak permanently.
Required Tools and Materials:
- Matching replacement straight pipe flange gasket (usually a stepped or ribbed rubber ring)
- A flathead or Phillips head screwdriver (or a nut driver/socket set)
- A plastic putty knife or non-scratch scrubbing pad
- A shallow plastic basin or old towel to catch water
1.Set Up Your Workspace and Catch Trapped Water:5 Minutes.
Place a low-profile plastic basin or a thick towel directly beneath the straight horizontal plumbing line. If your dishwasher hose is connected adjacent to this area, loosen its clamp and slide it off to give your tools clear, unhindered access to the straight pipe bolts.
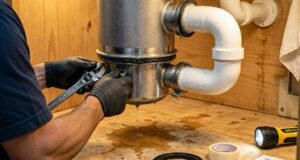
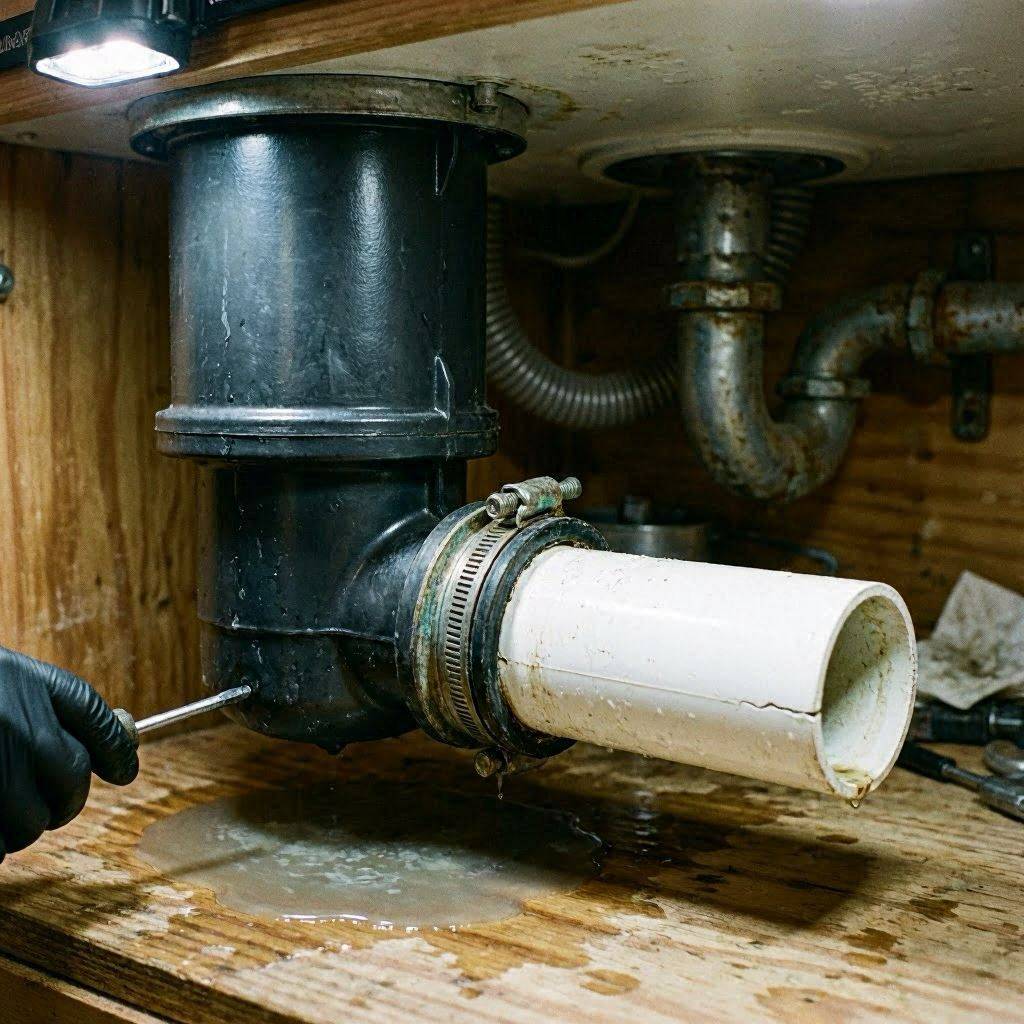
2.Extract the Mounting Bolts and Pull the Straight Pipe:10 Minutes.
Locate the one or two metal bolts holding the straight pipe bracket against the side of the disposal body. Use your screwdriver or socket wrench to turn these bolts counterclockwise. Remove the bolts completely, slide the metal mounting bracket backward along the pipe, and gently pull the straight tube out of the disposal’s exit socket.
3.Deep Clean the Joint and Inspect the Gasket:10 Minutes.
Pull the old rubber gasket off the end of the straight pipe or reach inside the disposal outlet collar to extract it. Inspect the rubber closely for splits, flat spots, or dry rot. Use a non-scratch pad dipped in warm water or rubbing alcohol to scrub away any slime, food slime, or hard water scale from both the lip of the straight pipe and the interior socket of the disposal; new rubber cannot form a seal against rough mineral buildup.
4.Seat the New Flange Gasket and Re-align the Line:10 Minutes.
Fit a fresh, matching rubber flange gasket cleanly over the lip of your straight tube. Make sure the raised ribs or stepped face of the gasket are oriented correctly according to your specific brand’s manual (typically, the flat side sits flush against the pipe face, while the ribbed side seats into the disposal body). Insert the pipe straight back into the disposal collar, ensuring it sits perfectly square without tilting.
5.Tighten the Bolts with Balanced Compression:15 Minutes.
Slide the metal mounting flange back into position over the ears of the straight pipe. Thread the mounting bolts in by hand for the first few turns to completely avoid cross-threading the plastic receiver holes. Using your tool, tighten the screws in an alternating pattern—turn the top screw twice, then the bottom screw twice. This balanced approach forces the straight pipe forward evenly, compressing the rubber gasket uniformly. Tighten until snug; do not over-torque.
Running a High-Pressure Test for Total Peace of Mind
Before putting your cleaning supplies back under the sink, perform a rigorous pressure check to ensure your new seal can handle real-world kitchen use:
- The Static Test: Fill your sink basin with roughly 2 to 3 inches of standing water while keeping the drain plugged. Let it sit for 5 minutes. Check the straight pipe with a dry paper towel to make sure the standing pressure isn’t forcing any slow weeping.
- The Dynamic Test: Pull the sink stopper out to release the volume of water while simultaneously flipping your disposal power switch to “On.” The combination of massive water flow and active motor vibration creates maximum structural stress on your straight discharge pipe. If the paper towel stays bone dry during this heavy flush, your garbage disposal leaking issue is completely resolved.
Proactive Habits to Prevent Recurring Straight Pipe Failures
To ensure your straight horizontal drain lines remain secure and leak-free for years to come, integrate these simple preventative practices into your household routine:
- Enforce Storage Clearance: Maintain a 2-inch “buffer zone” around the straight pipe under your sink. Never stack heavy item bins, roll-out organizer drawers, or plunger handles directly against or resting on top of the plumbing line.
- Avoid Grinding Impact Items: Do not throw rock-hard materials like large animal bones, thick fruit pits, or excessive amounts of ice cubes down the disposal. The erratic, heavy shaking caused by these items speeds up the loosening of your external pipe bolts.
- Perform a Biannual Hardware Check: Make it a habit twice a year during your deep kitchen cleaning to look under the sink, grab your screwdriver, and verify that the straight pipe mounting bolts remain snug. Keeping the compression constant prevents the gasket from shifting out of alignment.